Marking Visits as Paid
How to verify payments and mark visits as paid
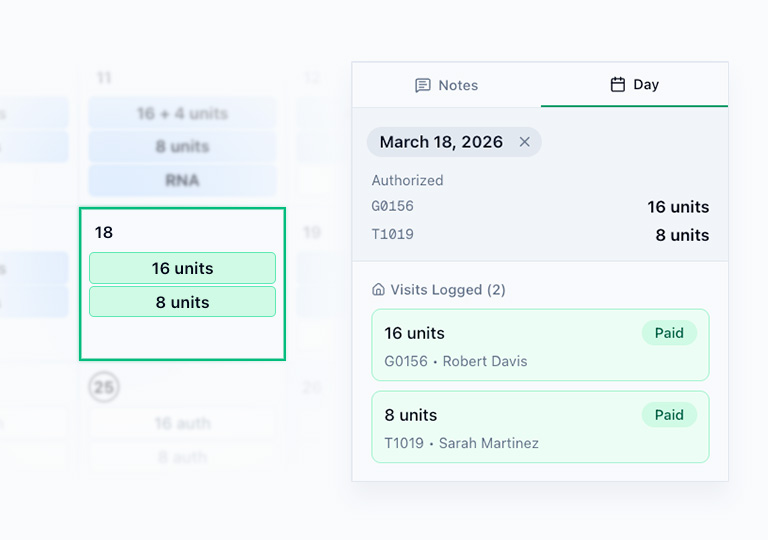
After verifying payment on the payor's portal, mark the visits as paid in Cadence.
Single Day
- Click a billed day (blue cell)
- In the detail panel, click "Mark as Paid"
- The cell turns green
Multiple Days
- Drag to select a range of billed days
- The quick action popover appears with "Mark Paid"
- Click it — all selected billed visits turn green
Quick toggle: Double-click any billed day to instantly toggle between billed and paid.
Paying the Current Month in Advance
If a binder has Bill the full month in advance enabled (set by an admin), you can mark upcoming days in the current month as paid once they've been billed — you don't have to wait for the date to pass. When viewing the current month, the "Select all" button in the calendar toolbar selects the whole month so you can mark everything paid in one pass; days that aren't billed yet are skipped and listed for you.
This only applies to the current calendar month — future months always stay locked.
Rejected Claims (Re-bill)
When a payor fully rejects a billed claim — for example, due to missing information or a misunderstanding:
- Click the billed (blue) day
- In the detail panel, hover over the visit and click "Adjust"
- Set Paid to 0 and Re-bill to the full amount
- Optionally add a note explaining the rejection
- The item converts directly to a re-bill (purple) — no paid item is created
The issue is then resolved offline. The biller will see the item in their "Re-bills" summary button and can re-submit the claim.
RNA Visits
RNA visits (T1001) have no units to adjust, so they use a simple toggle instead of the Adjust Payment form:
- Hover over a billed RNA item and click the purple "Re-bill" button
- The item turns purple immediately
- To undo, hover over the re-bill item and click "Undo"
Corrections (Adjust Payment)
When payment doesn't match what was billed — partial payment, overpayment, or any discrepancy — use the Adjust Payment form:
- Click the billed (blue) day
- Hover over the line item and click the "Adjust" button
- Enter:
- Paid — how many units were actually paid (0 to total)
- Re-bill — how many units need to be re-billed (0 or more)
- Note — optional description of what happened
- Click Save
Common scenarios
In the examples below, assume the original line item was billed for 8 units.
| Scenario | Paid | Re-bill | Result |
|---|---|---|---|
| Partial payment, rebill remainder | 6 | 2 | Original marked paid (6 units), new re-bill item (2 units) |
| Overpayment, return difference | 6 | 0 | Original marked paid (6 units), correction noted |
| Full rejection, rebill all | 0 | 8 | Original converts to re-bill (purple) |
| Accepted reduced payment | 6 | 0 | Original marked paid (6 units), no re-bill needed |
A denied recertification is not on this list, because it is not an Adjust Payment outcome. There are no paid or re-billed units to record. See Work That Will Never Be Paid below.
Undoing a Correction
Hover over the corrected item. If it was adjusted, you'll see an "Undo" button that restores the item to its original billed state and removes any re-bill items that were created by the adjustment.
Work That Will Never Be Paid
A rejected claim can be re-submitted. A denied recertification cannot: the visits were delivered, the payer has refused them, and there is nothing left to try. Mark those visits Unpayable instead of re-billing them.
Hover over the billed visit and click the maroon Unpayable button, or use the Unpayable button in the detail panel to write off a whole selection at once. It takes one click, the same as Mark Paid.
The caregiver is still paid for an unpayable visit. Full detail, including how to reverse one if the denial is overturned, is in Unpayable Visits.
Undoing Paid Status
Click a paid (green) day and use "Undo Paid" to revert it to billed status.
To reverse an unpayable visit, hover over it and click "Undo Unpayable". It goes back to whichever status it came from, which is Billed for most visits and Re-bill for one that was already in the biller's queue.
Only the Remittance role (and Admin) can mark visits as paid, mark them unpayable, or undo either one. These are exclusive permissions.
Billing Errors
When a visit was billed before the visit report was received (unverified billing), and the actual units differ from what was originally billed, a "Billing Errors" button appears in the calendar header. This amber button shows the count of unresolved errors across all months.
Click the button to see each error — the date, billing code, what was originally billed, and what was actually logged. Click any entry to navigate to that day.
Resolving a Billing Error
The detail panel shows a warning banner with the original billed units and actual units. Click "Adjust Payment" to open the correction form pre-populated with suggested values based on the error type:
- Overpaid (billed more than actual): Pre-fills paid units to the actual amount, rebill to 0
- Underpaid (billed less than actual): Pre-fills paid units to the billed amount, rebill for the difference
Review the values, adjust if needed, and confirm. Once resolved, the error drops from the active count. A permanent record of the billing error and its resolution date remains visible in the day detail panel.